Skip to content

1 Premises and Preliminary Checks
Filling the hot tub is the phase that precedes the first system startup. A correct filling procedure is essential to ensure proper operation of the filtration system, avoid pump damage due to dry running, and ensure rapid water heating.
1.1 Mandatory Checks Before Filling
DANGER: Before proceeding with filling, MANDATORILY verify that the following work has been completed:
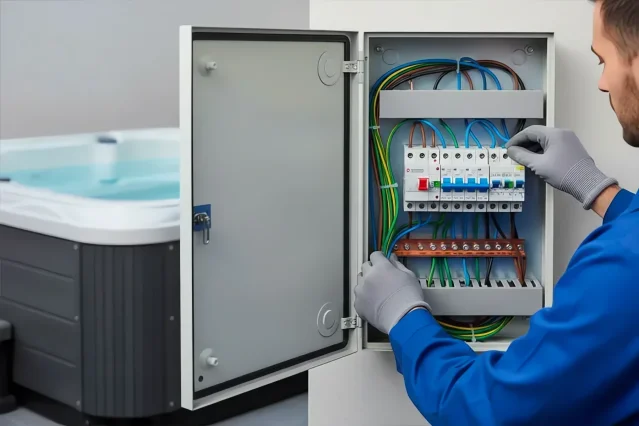
- Electrical connection performed by a licensed electrician and certified with declaration of conformity according to Ministerial Decree 37/2008
- 30 mA combined circuit breaker with residual current device installed and functioning
- Filter(s) correctly inserted in the skimmer
- Side panels closed and secured
- Hot tub positioned on final base and leveled
- Technical compartment inspected and free of foreign materials
- Drain valve closed
WARNING: NEVER fill if the electrical connection has not been completed and certified.
2 WATER IN Valve - Water Inlet
2.1 Identification and Characteristics
The WATER IN valve is the water inlet valve positioned on the external cladding of the hot tub. It is easily recognizable by the "WATER IN" label.
WATER IN valve technical characteristics:
- Thread: 1/2" female (20 mm diameter) or 3/4" female (25 mm diameter) depending on model
- Material: resistant technopolymer plastic material
- Closing system: manual valve
- Seal: O-ring gasket
- Maximum flow: 2 bar pressure
2.2 Garden Hose Connection
For filling, use a common garden hose with the following characteristics:
- Internal diameter: 1/2" (13 mm) or 3/4" (19 mm) compatible with WATER IN valve
- Length: sufficient to reach the water point without creating tight curves or restrictions
- Fitting: quick-connect with male 1/2" or 3/4" thread compatible with valve
- Resistance: minimum 4-5 bar pressure
Connection procedure:
- Verify that the WATER IN valve is in the CLOSED position
- Screw the garden hose fitting onto the WATER IN valve thread by rotating clockwise
- Tighten by hand
- Connect the other end of the hose to the water supply tap
- Verify that all connections are well tightened to avoid leaks
2.3 Filling Water Quality
Use potable water from the municipal water supply.
NOTE: Very hard water requires more frequent anti-limescale treatment. Very soft water can be corrosive to metal components. In case of well water or water with characteristics very different from optimal values, have a sample analyzed and contact customer service for specific treatment instructions.
3 Filling Procedure
3.1 Correct Water Level
The water level must be maintained within a precise range to ensure proper operation of the filtration and hydromassage system.
- MINIMUM level: the water must always be able to reach the skimmer or at least cover part of the most superficial jets.
- OPTIMAL level: water level symbol often silk-screened on the skimmer edge or indicated by a specific sticker.
- MAXIMUM level: an excessive level can create difficulties in suction and for the blower/air jet system (if present)
WARNING: Too low water level causes air suction by the filtration pump resulting in noise, cavitation, and possible impeller damage. Too high a level prevents proper skimmer operation which can no longer draw in surface impurities.
3.2 Filling Phases
- Once the hose is connected to the Water IN valve, fully open the water supply tap
- Water begins to flow into the hot tub through the filling circuit
- Constantly monitor the water level
- When the optimal level is reached, close the supply tap
- Disconnect the garden hose from the WATER IN valve
3.3 Indicative Filling Times
Times depend on mains water pressure and the diameter of the hose used.
4 Skimmer Flooding for Air Elimination
4.1 Air Bubble Formation
During filling, it is normal for air bubbles to form inside the hot tub's hydraulic circuit. These bubbles remain trapped in the pipes, pumps, and heater, preventing proper water circulation and causing abnormal noises during initial startup.
4.2 Air Elimination Procedure via Skimmer
It is good practice to flood the skimmer compartment before filling the hot tub, to prevent excessive air formation with consequent system error messages and startup difficulties.
5 Leak and Seal Check
5.1 Visual Inspection During Filling
During and after filling, carefully inspect the hot tub to identify any leaks:
Areas to check with particular attention:
- Hydromassage jets: gaskets and locking rings
- Suction jets: flanges and perimeter gaskets
- Pipe joints: all fittings in the technical compartment
- Heater: water inlet/outlet gaskets
- Pumps: motor shaft seals (o-rings)
- Valves: valve body and threaded connection
- Through points: pipe passages through the shell
WARNING: In the presence of significant leaks (continuous flow, rapid dripping) DO NOT proceed with complete filling. Photograph the point where the leak occurred, immediately stop filling, empty the hot tub, and contact customer service or the installer. Attempting improvised repairs with silicone or adhesive tape does NOT solve the problem and voids the warranty.
5.2 Acceptable vs Unacceptable Leaks
ACCEPTABLE leaks (normal settling):
- Very slight dripping from pump gasket (1-2 drops/hour) that stops after 24-48 hours of operation
- Surface moisture on newly tightened fittings that dries after 1-2 hours
- External condensation on pipes and components in the technical compartment (this is not a leak, it is normal)
UNACCEPTABLE leaks (require intervention):
- Continuous dripping that forms a puddle under the hot tub
- Visible water flow from fittings, valves, or jets
- Seepage from shell or from welding/gluing points
- Continuous leak
6 First Filtration System Startup
6.1 Startup Sequence
After filling and verifying the absence of significant leaks, proceed with the first system startup (follow the manual procedures provided for your Balboa/Gecko/Joyonway system).
In the first seconds of operation, it is normal to hear abnormal noises due to residual air in the circuit:
- Gurgling: air being expelled through outlet jets
- Cavitation: air mixed with water in the pump impeller
- Intermittent whistling: air passing through pipes
These noises should progressively decrease in the first 5-10 minutes of operation and cease completely within 30-60 minutes.
7 Final Level Adjustment
7.1 Level Variation During Startup
After the first filtration pump startup, the water level in the tub may vary slightly due to:
- Pipe filling: water from the tub fills the entire empty circuit
- Pump body filling: impellers and pump chambers fill up
- Residual air compression: air is compressed and occupies less volume
- People in water: level rises 5-15 cm with 2-4 people immersed
7.2 Level Top-Up
- Reconnect the garden hose to the WATER IN valve
- Open tap
- Top up slowly while observing the level in the skimmer
- When the level reaches optimal again, close tap and valve
- Disconnect garden hose
NOTE: During normal use, periodic water level top-ups will be necessary to compensate for evaporation.
8 Next Steps
With filling completed and the filtration system running, the hot tub is ready for:
- Testing all functions: activating hydromassage pumps, heater, lights, ozone
- Programming (settings, temperature, etc.)
- First water treatment (if desired)
- First use
NOTE:Heating the water from ambient temperature (15-20°C) to use temperature (36-40°C) requires variable time depending on capacity and heater power. During the first heating, keep the thermal cover positioned to reduce heat loss.
Can’t find the problem?